Video transitions go beyond merely shifting from one scene to another; they are instrumental in maintaining narrative flow and enhancing the viewer's experience.
They come in various forms, each imparting a unique effect on the story being told. For instance, a fade transition might convey a passage of time, while a sharp cut could indicate an abrupt change or shock.
This article delves into the intricacies of merging videos, focusing on achieving smooth and stylistically consistent transitions that enhance rather than detract from the video's overall impact.
Understanding video transitions
Any video merger can quickly stitch one clip to the next with a click of a button. The choice of a transition impacts the storytelling aspect of the video. It can set the pace, tone, and mood, thereby influencing the viewer's emotional response.
For example, a documentary might benefit from slow, thoughtful transitions that give the audience time to reflect, while a fast-paced action sequence might require quick cuts to keep up with the intensity of the scene. Understanding the narrative and emotional context of each part of your video is essential in making these decisions.
Types of transitions in video editing
1. Cut : The most basic and common transition, a cut is an instantaneous change from one scene to another. It's great for moving the story forward, without any particular emphasis on the transition itself.
2. Dissolve : This transition gradually fades out one scene while fading in the next. It often signifies a passage of time or a softening of the narrative flow.
3. Wipe : In a wipe transition, one scene is replaced by another through a boundary line that moves across the screen. It can be used to indicate a change in location or a passage of time.
4. Fade : Fades involve a scene gradually going to black (fade out) or a black screen gradually brightening to a scene (fade in). This type often signifies the beginning or end of a sequence or the entire video.
5. Zoom : This transition gives the effect of the camera moving closer (zoom in) or further away (zoom out) from the subject. It can be used to focus the viewer's attention or switch between scenes in a dynamic way.
6. Slide : One scene slides in from a side, top, or bottom, pushing the existing scene out of the way. You can find this in presentations, and it can give a dynamic, modern feel to the transition.
7. J-Cut and L-Cut : These transitions involve the audio of the next scene starting before the visual transition (J-Cut) or the audio from the current scene continuing into the next scene (L-Cut). They are effective in creating a seamless narrative flow.
8. Match Cut : A match cut takes the viewer seamlessly from one scene to another by matching the composition, action, or subject of the two scenes. It's a creative way to maintain continuity and can be very impactful when done correctly.
How to merge videos effectively
Combine multiple videos clips into a single continuous video. That’s how to merge videos. Sounds simple, isn’t it? You can achieve this process through any video editing software.
There are several options available, ranging from beginner-friendly applications, to more high-end, feature-rich software for seasoned professionals. Select a video merger that best suits your needs and skill level.
Below are general steps that apply to most video editing programs:
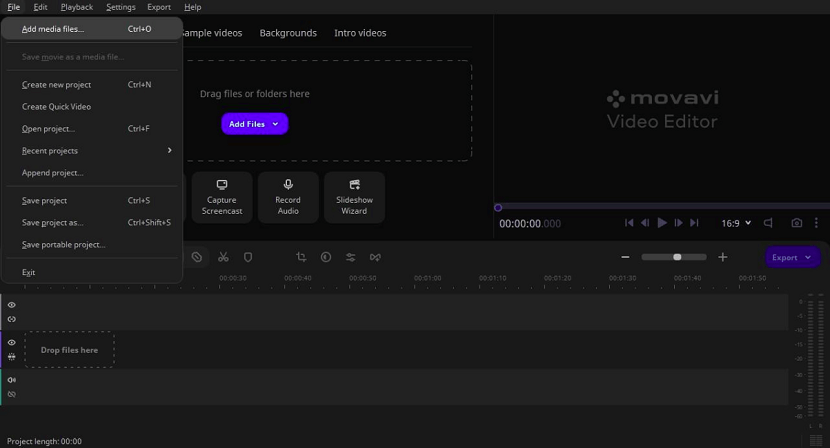
Step 1: Import your video clips
- Open your video editing software.
- Create a new project.
- Import the video clips you want to merge. This is usually done through a 'File Import' menu, where you can click on 'Add' or 'Open'.
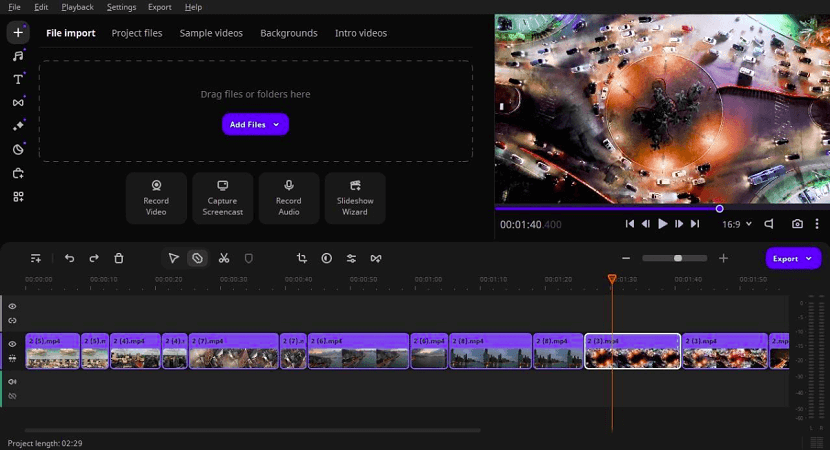
Step 2: Arrange the clips
- Drag and drop your video clips onto the timeline in the order you want them to appear.
- You can trim the clips by clicking and dragging the ends or using a specific tool to remove unnecessary parts.
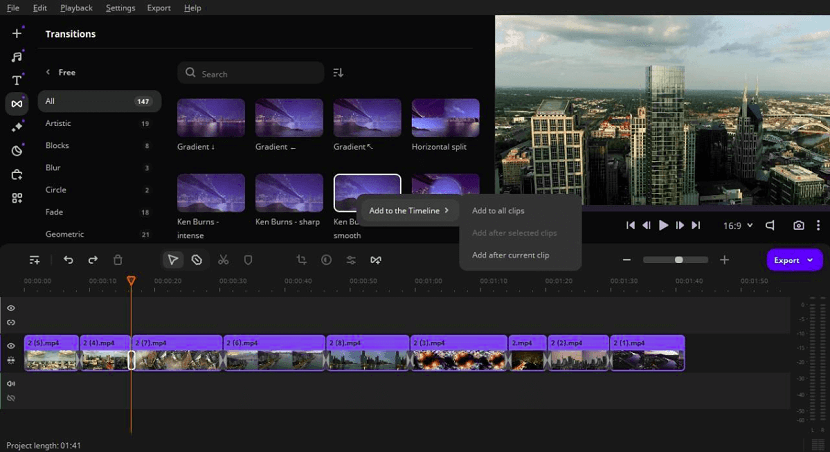
Step 3: Apply transitions
- Select the transition option on your video editing software's menu.
- Choose a transition type from the available options.
- Drag and drop the chosen transition between two clips on the timeline.
- Adjust the duration of the transition if necessary.
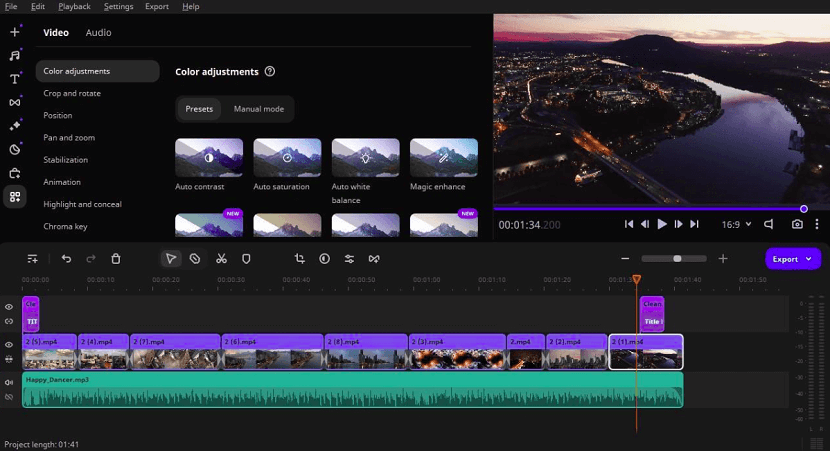
Step 4: Preview your video
- Regularly preview your video to make sure everything flows smoothly and looks the way you want it to.
- Make any necessary adjustments.
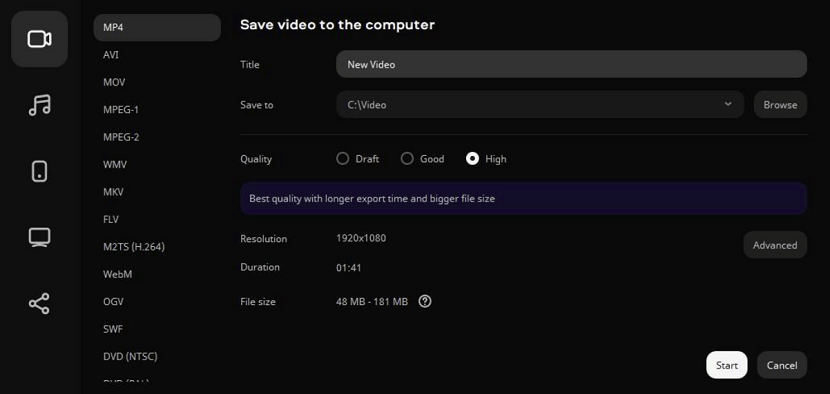
Step 5: Export the merged video
- Once you are satisfied with your video, export it.
- Select the 'Export' or 'Render' option in the program’s interface.
- Choose the desired video format and quality settings. Common formats include MP4, AVI, and MOV.
- Save the final video file to your computer or device or share it online.
Additional tips
- Ensure all your clips are in a compatible format and resolution before starting.
- Save your project frequently to avoid losing progress.
- Take your time with the editing process to ensure the best possible outcome.
Tips for creating organic transitions
Make videos with organic transitions that blend seamlessly with the style. Ensure each transition feels natural and relevant to the content. For instance, using a whimsical transition in a serious documentary can feel out of place. Similarly, overly complex transitions in a simple vlog can distract from the content.
Here are some essential tips to create effective transitions:
1. Ensure subtlety : Transitions should enhance the video's storytelling without drawing too much attention to themselves. Another important aspect is consistency; maintaining a uniform style of transitions throughout the video keeps a coherent narrative structure.
2. Avoid common mistakes : Don’t overuse transitions. While they can be effective storytelling tools, excessive use can make a video feel disjointed and confusing. Another mistake is not considering the audio aspect of transitions. Audio should always complement visuals for a seamless experience.
3. Use advanced techniques : For those looking to delve deeper, there are advanced techniques you can do in a video merger that involve using transitions for narrative purposes. This includes matching to the mood of the scene, using color and light to convey the time of the day, or employing motion to indicate movement or progression.
4. Optimize for different platforms : Different platforms, like YouTube or Instagram, often require different editing tricks and styles. For YouTube, longer transitions might be more acceptable, whereas Instagram stories might benefit from quicker, more dynamic transitions. Understanding the norms and expectations of each platform is key to effective video editing.
5. Be creative : Transitions offer a canvas for creativity. Experimenting with different types of transitions can lead to unique and compelling video. For example, a transition that mimics the opening of an eye can be used to reveal a new scene, adding a layer of creativity to the narrative.
6. Practice : The applications of effective video merging are vast, from vlogging and documentary filmmaking to marketing and educational content. Each field has its specific needs and stylistic approaches, making the video merging skill versatile and valuable.
Wrap up
Merging videos is a fundamental skill in video editing that not only allows you to put two videos together, but also offers endless creative possibilities. With the right software, techniques, and considerations, anyone can create impactful and engaging video content.
Remember to practice regularly and experiment with different approaches to find your unique style. As you continue to hone your skills, you will be able to seamlessly merge videos and create visually stunning content that captivates your audience.
If you found this article helpful, we encourage you to share it on your social media platforms—because sharing is caring! For more information about article submissions on our website, feel free to reach out to us via email.
Send an emailWritten by RGB Web Tech
Latest Technology Trends
Latest technology trends shaping the future, including AI advancements, blockchain innovation, 5G connectivity, IoT integration, and sustainable tech solutions. Explore breakthroughs in quantum computing, cybersecurity, augmented reality, and edge computing. Stay ahead with insights into transformative technologies driving innovation across industries and revolutionizing how we live, work, and connect.
Related Articles - Tool and Software

Website Monitoring Tools
We compared the best web monitoring tools and softwares that can help improve website uptime and overall performance.
Merge Videos
Master seamless video transitions! Elevate your content with style as you learn the art of merging videos flawlessly. Dive into perfection now!
AI in Digital Marketing
Maximize marketing impact with AI: Discover expert tips and best practices for integrating artificial intelligence in your digital marketing strategy.

Best Sales Enablement Tools
Maximize sales success with expert insights on leveraging sales enablement tools. Boost efficiency, close deals, and elevate your business strategy.

Premier AI Essay Detector Bypasser
Humbot Review: Your go-to solution for effortlessly navigating through AI essay detectors. Outsmart plagiarism checks with this premier tool.

Blogging Tools Every Blogger Needs
Discover essential blogging tools for success! From SEO plugins to editorial calendars, equip yourself with must-have resources for thriving online.

Features to Look for in the Best Proposal Software
Discover key features to look for in the best proposal software, from customization to automation, to streamline your proposal process effectively.

Role of Annotation Tools in Interactive eBooks
Boost reader engagement with interactive eBooks! Discover how annotation tools enhance learning and retention, making reading a dynamic experience.
How Real-Time Tracking Improves Task Management
Boost productivity with real-time tracking! Discover how instant updates streamline task management, enhance collaboration, & drive efficiency.

FlexClips AI Tools A Leap Forward in Video and Photo Editing
FlexClip's AI tools: revolutionizing video & photo editing with smart features for creativity, ease, & stunning results. Try now!

AI-Powered Digital Signage Software
The way outdoor marketing is done has seen an overhaul in the last few years and one of its main components that marketers love now is the AI digital signage software.

The Best UK Proxy : Navigating the Digital Landscape with Precision and Compliance
Best UK proxy solutions to browse securely, access geo-restricted content, and ensure full compliance with UK digital regulations. Stay anonymous, enhance speed, and protect your online privacy with trusted proxy services.
FlexClip Comprehensive Review Capabilities Pricing and Alternatives
FlexClip in 2025: in-depth review of AI-powered features, affordable pricing plans starting at free, and the best alternatives like Canva and InVideo for seamless video editing.
Top 8 Best Tools to Humanize ChatGPT Text and Make It Undetectable
Top 8 tools to humanize ChatGPT text and make AI-generated writing undetectable. Boost authenticity, bypass AI detectors, and transform robotic content into natural, human-like text.

Why Easybrain Solitaire Online Works for All Skill Levels
Why Easybrain Solitaire Online is perfect for beginners and experts alike with smooth gameplay, smart hints, daily challenges, and relaxing fun.

Traffic Solutions for Modern Business Websites using Push Notifications
How push notification traffic helps modern business websites generate repeat visits, control traffic flow, and measure performance through real user behavior.

Measuring the ROI of Case Management Software in Your Nonprofit
Learn how to measure the ROI of case management software in your nonprofit. Discover key metrics, cost savings, efficiency gains, and impact evaluation strategies to maximize your technology investment.